Run a Simple Web Server
The following documentation will show you how to launch an Instance using the default Security Group. Once running, we will enable a basic HTTP service on port 80 by adding an additional Security Group.
Launch an Instance Using Horizon
- Navigate to the Horizon web interface at https://cloud.cades.ornl.gov/.
- Log in with your UCAMS credentials.
- Domain:
ornl - Username:
Your three-letter UCAMS ID - Password:
Your UCAMS password
1.Navigate toProject→Compute→Instances.
- Domain:
- Click the
Launch Instancebutton, and complete the launch instance wizard.- For this exercise use the
Defaultsecurity group.
- For this exercise use the
If you have never launched a VM Instance before, check out the tutorial linked below before proceeding.
📖 How to: Launch a VM Instance from an Image
Add Rule for TCP Traffic
Once we have our VM Instance up and running, we need to make sure that the Instance can receive incoming traffic on port 80. We'll create a custom Security Group, add the required rule for HTTP traffic to our new (or existing) Security Group, and assign that Security Group to our VM Instance.
If you require HTTPS support on port 443, see our SSL - Let's Encrypt documentation.
Create Custom Security Group
- Navigate to
Project→Compute→Access & Security→Security Groups. - Click
+ Create Security Groupat the top right of the Security Groups table.
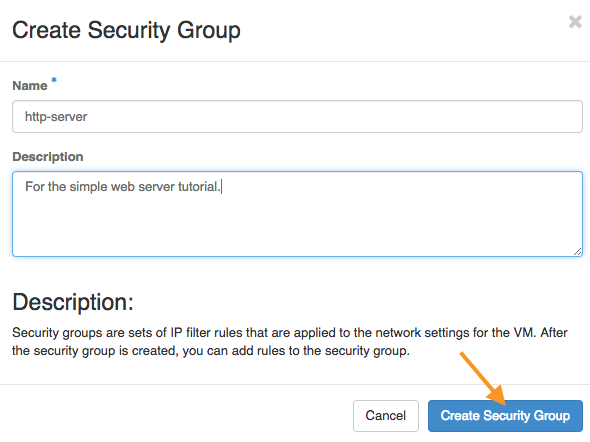
- In the resulting dialog, fill out the
NameandDescription(optional) fields.- We're using http-server for this example.
- Click the
Create Security Groupbutton.

Your new Security Group should now be available in the Security Groups table.
Alternatively, you can modify an existing group using the corresponding Manage Rules button.
Add Rule to Custom Security Group
- Find the newly created
http-serverrule on theSecurity Groupstab.

- Click the
Manage Rulesbutton. - On the Manage Rules screen, click the
Add Rulebutton.

- In the resulting dialog, click the drop-down field under
Rule. - Choose the
HTTPrule template from the drop-down list.- Choosing the HTTP template will automatically set the port to
80and set the direction toIngress.
- Choosing the HTTP template will automatically set the port to
- In the
Remotebox, chooseCIDR(preferred) and leave the field as0.0.0.0/0or enter the desired inter-domain range. See CIDR examples for more information. - Click
Addat the bottom of the dialog box to implement your custom rule.

- Confirm your new custom rule is displayed in the Manage Rules screen.

Add New Security Group to Your VM Instance
- Navigate to
Project→Compute→Instances, and find the Instance on which you would like to run your HTTP server. - Click the ▾ drop-down menu on your Instance's listing, and select
Edit Security Groupsfrom the resulting menu.

- In the resulting window, click
+to add thehttp-serversecurity group to your VM Instance. - Click
Saveto associate yourhttp-serversecurity group with your Instance.

Connect to Your Instance Using SSH
- Open a Bash terminal.
- Execute
$ ssh cades@128.219.186.42.- Replace
128.219.186.42with the IP address of your own Instance.
- Replace
- You should now be connected to your VM Instance via SSH.

For more detailed information on connecting to your VM Instance using SSH, please see the SSH tutorials, linked below.
📖 How to: Access Your VM Instance Using SSH
For Windows users, we have developed a separate tutorial that walks you through connecting to your VM Instance using PuTTY's SSH client.
Set up Your Web Server
For the web server, we need to create a web directory and populate it with a basic index.html page.
- Execute the following in the VM's Bash terminal.
$ mkdir www
$ cd www
This will create a www directory. Next, we need to open a new file (index.html) in the VIM text editor and populate it with some basic HTML markup.
- In the Bash terminal, execute
$ vim index.htmlto create the new file and open it in VIM. - Once in VIM, add the following lines to your file.
<html>
   <head>
      <title>
          Hello world!
      </title>
   </head>
   <body>
      <h1>Hello world!</h1>
   </body>
</html>
Now that we have our files in place, we can start a simple web server using Python.
- Ensure that you are still in the
wwwdirectory where you placed yourindex.htmlfile. - Execute
$ sudo python -m SimpleHTTPServer 80in your VM's Bash terminal. A message will confirm that the server is running.

Test the Web Server
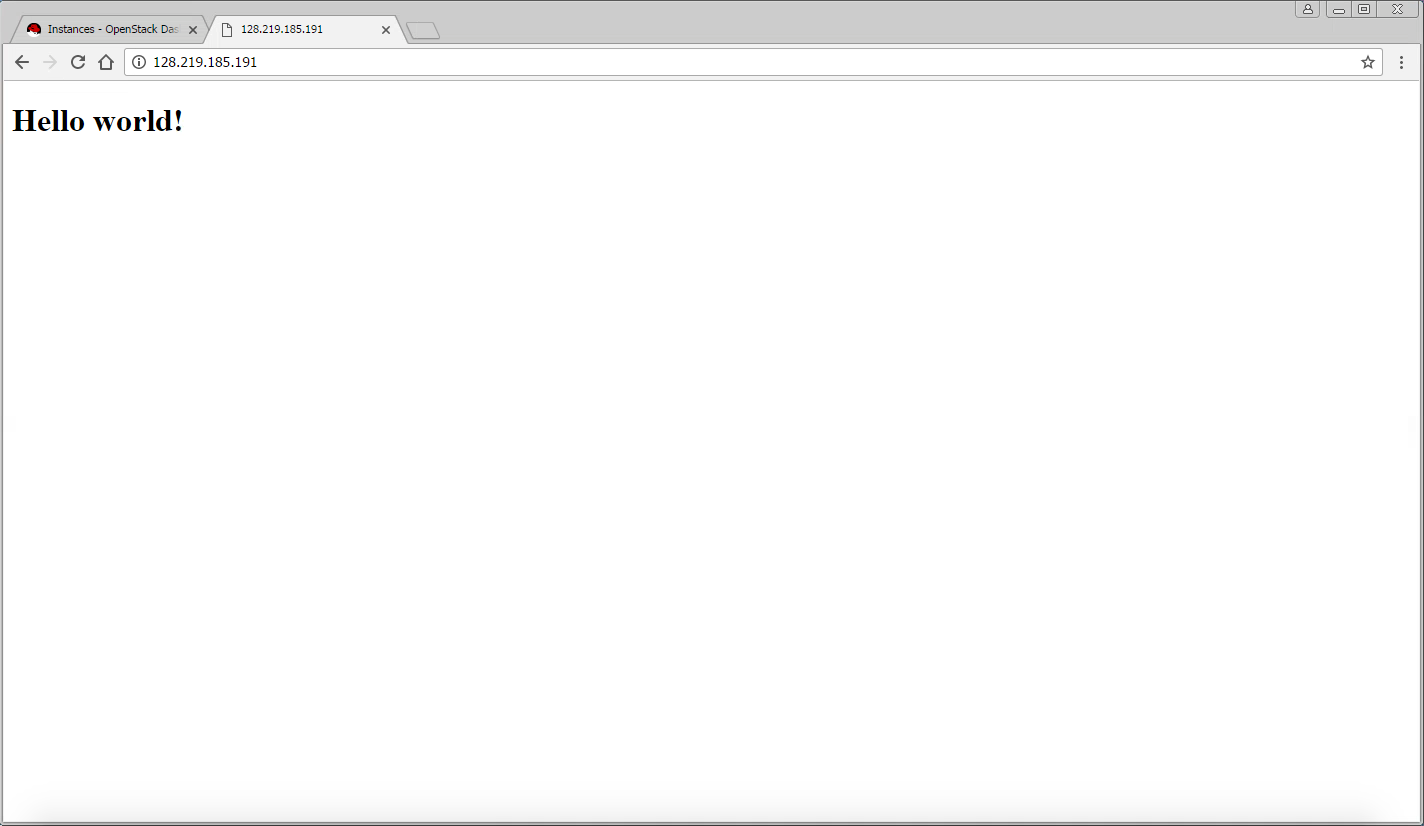
You should now be able to access your "hello world" page from a web browser by entering the IP address of your instance as the URL.

Troubleshooting
If you get an error when attempting to navigate to your Instance's IP using a browser, ensure that:
- You used the external network option when you configured your Instance.
- You are within the ORNL network or you have added a SAFER firewall exception for your VM Instance's IP address on Port 80 (or whatever port you specified in the Python command).
- You have a Rule in your Security Group that grants access to your VM Instance on Port 80 (or whatever port you specified in the Python command).
- Your Python server is active on your VM Instance.
